Rachel
Tuesday, November 30, 2010
Rachel
Posted by
Rachel
on
11/30/2010
0
Comments for Rachel :o)
![]()
Sunday, November 21, 2010
November 2010 Mystery Knit Along
Sunday, November 21, 2010
PART 5 - Working a Tapered Edge and Fastening Off
----------------------------------------------------
Things You Need To Know:
• Throughout this pattern I refer to ridges rather than rows. A ridge in garter stitch is two knit rows.
• Where possible, all outside first stitches are slipped to help with the joining. I haven't put this in the instructions so as to simplify them and it's not disastrous if you forget.
• w&t (wrap and turn) is worked like this:
Bring the yarn forward, slip the next stitch purlwise, take the yarn back again, replace the slipped stitch on the left hand needle, bring the yarn forward again and turn the work.
----------------------------------------------------
Begin working a tapered edge immediately after working an 8 stitch ridge from Part 4.
Then work as follows:
K8, sl 2, pick up and K1, pass both slipped sts over, turn and knit back. (9sts)
Work one 7 stitch ridge (K7, w&t and knit back)
K7, sl 2, pick up and K1, pass both slipped sts over, turn and knit back. (8sts)
Work one 6 stitch ridge (K6, w&t and knit back)
K6, sl 2, pick up and K1, pass both slipped sts over, turn and knit back. (7sts)
Work one 5 stitch ridge (K5, w&t and knit back)
K5, sl 2, pick up and K1, pass both slipped sts over, turn and knit back. (6sts)
Work one 4 stitch ridge (K4, w&t and knit back)
K4, sl 2, pick up and K1, pass both slipped sts over, turn and knit back. (5sts)
Work one 3 stitch ridge (K3, w&t and knit back)
K3, sl 2, pick up and K1, pass both slipped sts over, turn and knit back. (4sts)
Work one 2 stitch ridge (K2, w&t and knit back)
K2, sl 2, pick up and K1, pass both slipped sts over, turn and knit back. (3sts)
Work one 1 stitch ridge (K1, w&t and knit back)
K1, sl 2, pick up and K1, pass both slipped sts over, turn and knit back. (2sts)
At this point slip these 2 stitches, pick up and K1 and pass the slipped stitches over, fasten off and you’re done!
Big thank you's go out to Frankie Brown for creating such a lovely pattern and for allowing our group to use it for our mystery knit along this month! I knew everyone would find her written instructions very easy to understand!
All Frankie's ravelry patterns are free to download but, if you enjoy them, please consider making a donation to the Children’s Liver Disease Foundation, a charity which funds research and supports the families of children with a liver disease. You can do this easily by going to her fundraising page www.justgiving.com/frankiesknittedstuff
----------------------------------------------------
Part 1:
http://rachelsknittingcorner.blogspot.com/2010/11/rachels-knitting-room-november-2010.html
Part 2:
http://rachelsknittingcorner.blogspot.com/2010/11/rachels-knitting-room-november-2010_16.html
Part 3:
http://rachelsknittingcorner.blogspot.com/2010/11/rachels-knitting-room-november-2010_17.html
Part 4:
http://rachelsknittingcorner.blogspot.com/2010/11/rachels-knitting-room-november-2010_18.html
Posted by
Rachel
on
11/21/2010
1 Comments for Rachel :o)
![]()
Labels: free knit pattern kal knitalong along dishcloth cloth washcloth wash ravelry
Thursday, November 18, 2010
November 2010 Mystery Knit Along
Thursday, November 18, 2010
PART 4 - Working the Spiral
Things You Need To Know:
• Throughout this pattern I refer to ridges rather than rows. A ridge in garter stitch is two knit rows.
• Where possible, all outside first stitches are slipped to help with the joining. I haven’t put this in the instructions so as to simplify them and it’s not disastrous if you forget.
• w&t (wrap and turn) is worked like this:
Bring the yarn forward, slip the next stitch purlwise, take the yarn back again, replace the slipped stitch on the left hand needle, bring the yarn forward again and turn the work.
----------------------------------------------------
You’ll now be working in rounds so you need to mark the start of the first round with a safety pin after the last ridge worked. I know a spiral doesn’t actually have rounds but, for the purposes of shaping this thing, we need to impose rounds on it!
So, having put your safety pin in, continue as follows:
*Work one 8 stitch ridge (K8, w&t and knit back)
Work one 10 stitch joining ridge (K9, sl 1, pick up and K1, psso, turn and knit back.
Repeat from * until you get back to your safety pin.
----------------------------------------------------
Part 1:
http://rachelsknittingcorner.blogspot.com/2010/11/rachels-knitting-room-november-2010.html
Part 2:
http://rachelsknittingcorner.blogspot.com/2010/11/rachels-knitting-room-november-2010_16.html
Part 3:
http://rachelsknittingcorner.blogspot.com/2010/11/rachels-knitting-room-november-2010_17.html
Posted by
Rachel
on
11/18/2010
1 Comments for Rachel :o)
![]()
Labels: free knit pattern kal knitalong along dishcloth cloth washcloth wash ravelry
Wednesday, November 17, 2010
November 2010 Mystery Knit Along
Wednesday, November 17, 2010
PART 3 - Getting Ready to Work the Spiral
PROGRESS PHOTOS POSTED:
----------------------------------------------------
In the words of the designer:
Things You Need To Know:
• Throughout this pattern I refer to ridges rather than rows. A ridge in garter stitch is two knit rows.
• Where possible, all outside first stitches are slipped to help with the joining. I haven’t put this in the instructions so as to simplify them and it’s not disastrous if you forget.
• w&t (wrap and turn) is worked like this:
Bring the yarn forward, slip the next stitch purlwise, take the yarn back again, replace the slipped stitch on the left hand needle, bring the yarn forward again and turn the work.
----------------------------------------------------
Now you have to build up to 10 sts ready to work the spiral.
First knit into the front and back of your one stitch, giving you 2 sts.
Now you have to work a combination of joining ridges, short rows and increases for a while so I will give you ridge by ridge instructions for this bit:
Ridge 1: K1, sl 1, pick up and K1 (this first picked up stitch should be from the ridge above the tail of yarn left from casting on), psso, turn and knit back.
PLEASE NOTE: YOU WILL BE PICKING UP STITCHES ALONG THE OUTSIDE EDGE OF YOUR CIRCLE TO MAKE A SPIRAL...EACH RIDGE IN THE CIRCLE WILL HAVE A STITCH AT THE END WHICH CAN BE PICKED UP AND KNIT.
YOU CAN VIEW THIS PROGRESS PHOTO TO SEE WHERE THE FIRST STITCH IS THAT YOU NEED TO PICK UP: http://www.flickr.com/photos/15226377@N07/5184000913/
Ridge 2: Kf&b, sl 1, pick up and K1, psso, turn and knit back (3sts).
Ridge 3: K2, sl 1, pick up and K1, psso, turn and knit back.
Ridge 4: Kf&b, K1, sl 1, pick up and K1, psso, turn and knit back. (4sts)
Ridge 5: K2, w&t, knit back.
Ridge 6: Kf&b, K2, sl 1, pick up and K1, psso, turn and knit back (5sts).
Ridge 7: K4, sl 1, pick up and K1, psso, turn and knit back.
Ridge 8: Kf&b, K3, sl 1, pick up and K1, psso, turn and knit back (6sts).
Ridge 9: K5, sl 1, pick up and K1, psso, turn and knit back.
Ridge 10: Kf&b, K4, sl 1, pick up and K1, psso, turn and knit back (7sts).
Ridge 11: K5, w&t, knit back.
Ridge 12: Kf&b, K5, sl 1, pick up and K1, psso, turn and knit back (8sts).
Ridge 13: K7, sl 1, pick up and K1, psso, turn and knit back.
Ridge 14: Kf&b, K6, sl 1, pick up and K1, psso, turn and knit back (9sts).
Ridge 15: K8, sl 1, pick up and K1, psso, turn and knit back.
Ridge 16: Kf&b, K7, sl 1, pick up and K1, psso, turn and knit back (10sts).
That’s the hardest part done.
From now on it’s easy peasy knitting.
Use your cast on tail to sew up the gap in the circle and to neaten the centre.
That’s the only sewing up you’ll need to do apart from sewing in ends when you start new balls of yarn.
----------------------------------------------------
Part 1:
http://rachelsknittingcorner.blogspot.com/2010/11/rachels-knitting-room-november-2010.html
Part 2:
http://rachelsknittingcorner.blogspot.com/2010/11/rachels-knitting-room-november-2010_16.html
Posted by
Rachel
on
11/17/2010
0
Comments for Rachel :o)
![]()
Labels: free knit pattern kal knitalong along dishcloth cloth washcloth wash ravelry
Tuesday, November 16, 2010
November 2010 Mystery Knit Along
Tuesday, November 16, 2010
PART 2 - Second half of the centre circle
----------------------------------------------------
In the words of the designer:
----------------------------------------------------
Things You Need To Know:
• Throughout this pattern I refer to ridges rather than rows. A ridge in garter stitch is two knit rows.
• Where possible, all outside first stitches are slipped to help with the joining. I haven’t put this in the instructions so as to simplify them and it’s not disastrous if you forget.
• w&t (wrap and turn) is worked like this:
Bring the yarn forward, slip the next stitch purlwise, take the yarn back again, replace the slipped stitch on the left hand needle, bring the yarn forward again and turn the work.
*K2, w&t and knit back.
K4, w&t and knit back.
K6, w&t and knit back.
K8, w&t and knit back.
K6, w&t and knit back.
K4, w&t and knit back.
For the second half of the circle work five repeats from * and then knit 10 sts.
Now cast off 9 sts, leaving you with one stitch on your needle at the outside of the circle.
Ignore the fact that the circle is not yet closed, we’ll deal with that later.
----------------------------------------------------
Part 1:
http://rachelsknittingcorner.blogspot.com/2010/11/rachels-knitting-room-november-2010.html
Posted by
Rachel
on
11/16/2010
0
Comments for Rachel :o)
![]()
Labels: free knit pattern kal knitalong along dishcloth cloth washcloth wash ravelry
Monday, November 15, 2010
November 2010 Mystery Knit Along
Monday, November 15, 2010
PART 1 - First half of the centre circle
----------------------------------------------------
The trickiest part of this pattern is the beginning. Once you get past that part, it's a breeze!
In the words of the designer:
----------------------------------------------------
Things You Need To Know:
• Throughout this pattern I refer to ridges rather than rows. A ridge in garter stitch is two knit rows.
• Where possible, all outside first stitches are slipped to help with the joining. I haven’t put this in the instructions so as to simplify them and it’s not disastrous if you forget.
• w&t (wrap and turn) is worked like this:
Bring the yarn forward, slip the next stitch purlwise, take the yarn back again, replace the slipped stitch on the left hand needle, bring the yarn forward again and turn the work.
To Begin:
Using the long tail method cast on 10 sts, leaving enough of an end to sew up a short seam.
*K2, w&t and knit back.
K4, w&t and knit back.
K6, w&t and knit back.
K8, w&t and knit back.
K6, w&t and knit back.
K4, w&t and knit back.
That’s 6 ridges knitted and one pie-shaped section of the centre circle worked.
Repeat from * four more times and then work one ridge(2 garter rows) on all 10 sts.
Your knitting should now look something like a semi-circle.
----------------------------------------------------
Two days will be given to complete this first part :)
Posted by
Rachel
on
11/15/2010
0
Comments for Rachel :o)
![]()
Labels: free knit pattern kal knitalong along dishcloth cloth washcloth wash ravelry
Thursday, November 11, 2010
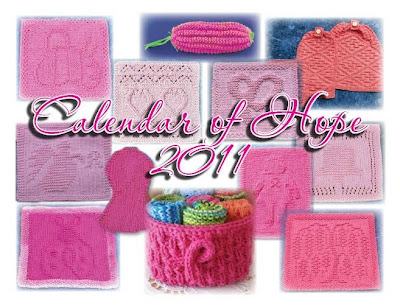 Our 2011 Calendar of Hope is now available for download!
Designed by Rachel van Schie
Wednesday, June 02, 2010
In Loving Memory of Willow Scott-Hannam
~ November 20, 2005 – June 01, 2010 ~
~ ~ ~ ~ ~ ~ ~ ~ ~ ~ ~ ~
I designed this pattern in honour of a very special little girl who was very close to our hearts, who left this world way too soon.
Willow’s infectious smile and fun loving spirit will be greatly missed.
~ ~ ~ ~ ~ ~ ~ ~ ~ ~ ~ ~
Posted by
Rachel
on
11/11/2010
1 Comments for Rachel :o)
![]()
Tuesday, November 09, 2010
This pattern is very adaptable... you can make it as large or small as you'd like so you can choose to make it into a dishcloth, or a placemat, a baby blanket or even a rug... depending on what yarn and needles you use and how long you keep knitting it. I will post enough parts to get you roughly to the size of a dishcloth and after that, it's up to you if you'd like to go farther with it.
We will not be working with a lot of stitches, so short needles work really well, I'm actually using 2 short double pointed needles just because of their length, nothing to do with them being double pointed.
You will want to use a needle size that's best for the type of yarn you're going to use. So for example, I'm using Bernat Handicrafter Cotton with size 4.00 mm needles. If you are wanting to use something like sock yarn, you will want to use smaller needles, and if you are going to use a bulkier yarn, you will want to use larger needles.
As for the colour, that's totally up to you guys! I think a variegated would look pretty as well as a self-striping yarn. The good thing about this pattern is that you can change colours whenever you want, so if you've got lots of scraps leftover that would be good too.
I will be posting this kal a little different from past ones. Instead of posting daily rows, I will be breaking the pattern up into parts and I will be giving you a couple of days to complete each part.
I chose to use this pattern for our next kal because it is something very unique, creative, versatile, and a wee bit of a challenge. Don't let the challenging part discourage you from trying it out though... With the help of the designer's easy-to-understand instructions, it'll be a breeze!
As always, any questions or concerns, please feel free to email me at ramavasc@yahoo.com
Take care and thanks for knitting along with us!
Hugs,
Where you can find me:
Follow Me On Twitter:
Knits by Rachel:
Rachel's Knitting Corner:
Posted by
Rachel
on
11/09/2010
0
Comments for Rachel :o)
![]()
Labels: free knit pattern kal knitalong along dishcloth cloth washcloth wash ravelry


