


How Do You Block Your Patterns?
.
This is the number one question I get asked all the time!
.
So I thought I'd put together a little slide show tutorial which actually turned out to be not so little when it was all said and done...lol!
So I thought I'd put together a little slide show tutorial which actually turned out to be not so little when it was all said and done...lol!
.
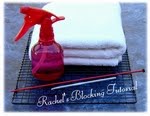
Before starting here's the things you will need:
Before starting here's the things you will need:
 1. bath towel
2. cooling rack
3. crochet hook
4. knitting needle
5. water spray bottle
.
The crochet hook isn't an essential but I find it works real good to get in the little places that need to be flattened.
.
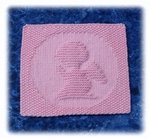
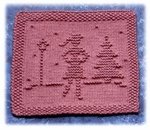
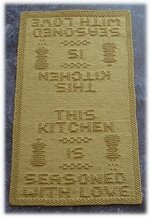
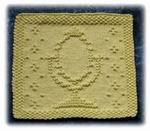
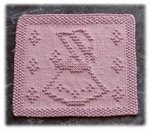
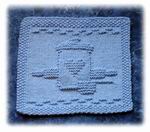
You will notice throughout the tutorial that I refer to the dishcloth pattern as the cotton piece. I say cotton piece because these blocking instructions will work well for any cotton dishcloth, placemat or towel with a picture on it.
You will notice throughout the tutorial that I refer to the dishcloth pattern as the cotton piece. I say cotton piece because these blocking instructions will work well for any cotton dishcloth, placemat or towel with a picture on it.
.
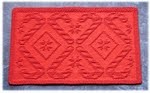
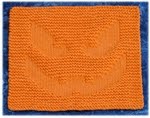
1) Fold the bath towel in half and then in half again so you have a nice cushy bottom. The reason for the folded bath towel is so that you have a thick base so that when you push the background stitches of your Dishcloth down, it kind of makes the picture or letter stitches of your piece embossed or puffed up.
.
.
 2) Lay your cotton piece down on top of the folded bath towel.
 3) Now flip the piece over and give the back a good spray.
 4) Turn it over and do the same to the front of your piece.
 5) Now give a little tug all around to try and get your piece all nice and straight around the edges. Sometimes I find a ruler works as a good straight edge when doing this.
 6) Okay, now I usually work from the inside of my piece, out. It's not crucial but that's just how I do it.
 7) What you want to do is push down in a stamping motion on all your flat (stockinette) stitches with the back of your knitting needle. I start along one edge and work my way around, moving to the center as I go along, in this case we're working on the top of Little Garden Boy's hat.

 8) Now move on down to the rest of the hat and do the same thing, getting those stockinette stitches nice and flat. You will start to notice because of the cushy bottom from your bath towel, the bumpy (garter) stitches standing out more.
 9) If you get a stubborn stitch that just doesn't want to be pushed down like this one, just push it down with the pointy part of your needle and tell it to stay!

 10) Now, doing the same thing with the pointy part of your needle, move on down the backside of Little Garden Boy.


 11) Okay, see those itty bitty stubborn stitches along both sides of his arm? Get your needle and start poking! You can pretend he's your little voodoo doll!

 12) Now you're going to want to flatten his tummy with the back of your knitting needle. Don't you wish getting a flat tummy was just that easy?


 13) Move around flattening his backside with your needle.
 14) Now you'll see his body taking shape. I find it's kind of like when you did colouring pages as a kid and you outlined everything in marker before filling it in with crayon...well, that's how I used to colour anyway.
 15) Okay, now make your way around the outside of him with the point of your needle.


 16) All the way around...


 17) If you've got a line of stitches like this one down his back, you can just press down with the side of your needle on both sides of that line...
 18) ...as well as the bottom stitches of his boot.


 19) After you've made it all the way around him you can flip your needle around and start flattening the rest of the stockinette stitches with the back of your knitting needle.
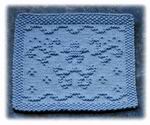
 20) Now everything is done except for his little watering can and the flowers along the side borders.
 21) So let's start with the watering can.
 22) This is where the end of the crochet hook works well. Push down those stockinette stitches inside the watering can's handle.
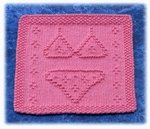
 23) Now we'll work on the little flowers.
 24) See those single stitches that make up the flower? Get your knitting needle and stick the pointy end right inside one of those stitches.
 25) Now lift up on it while holding your piece down with the other hand...don't worry about how hard you pull up on that stitch, it goes back down. We just want to make it pop up a bit more than it is.
 26) Okay, now all the loops of the flower have been pulled up with the point of my needle so now get your crochet hook and push the end of it right in the middle of those loops.
 27) You can use the crochet hook for the middle of the stem of the flower as well.
 28) Now get your knitting needle and make a nice little "X" with it in between those loops of the flower.
 29) Press the side of your needle alongside the diagonal stitches of the flower's stem.
 30) Flatten any surrounding background stitches and voila!
 31) Looking at both flowers (bottom flower is done but the top one hasn't been blocked yet) doesn't seem like it makes much of a difference but believe me it does! The difference is all in the drying of your piece. That's when you'll notice all your hard work!
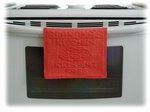
 32) Now you're going to want to very gently pick up your blocked piece and lay it on your cooling rack. I choose to use a cooling rack so everything dries evenly. If you're in a real hurry for it to dry, you can also stick a fan in front of it... the moving air will dry it in no time at all!
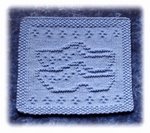
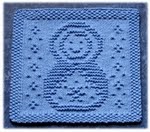
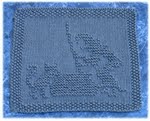
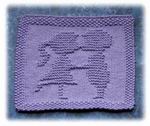
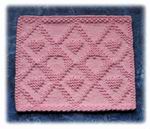
 Here is Little Garden Boy all finished, blocked and dried!
.
Now I couldn't imagine having to block a dishcloth after every use of it but when giving as a gift I always like my cloths to look as pretty as they can be for their recipient...it makes a big difference :o)
.
Enjoy and I hope you find this info helpful with your next project!
.
Hugs,
Rachel
.
Follow me on TWITTER:
Follow me on TWITTER:
Knits by Rachel:
Rachel's Knitting Corner:
21 comments:
Thanks for the blocking slide show. It gave me good pointers.
Marsha
Rachel,
Thanks for the fun knit along - I had been meaning to make a washcloth from your pattern for over a year! This was a great way to get me going. I enjoyed not knowing what I was making!
Leslie in Texas
Rachel,
a most excellent tutorial, thank you!
Thanks for the great tutorial and for the KAL. This is the first KAL for me and I completed each day the evening it was posted. Love the cloth and will block and photograph tomorrow. THANKS!
WOW!!! I have never done that to a cloth before, no wonder mine never looked very good(at least the picture ones).
Lois
I have been looking for the garden boy pattern that is in your tutorial. I have made the garden girl. Please advise. Great tutorial. Thanks.
Judy
Thanks for the fun knit along.Can.t
wait for the next one Lynda
I really enjoy your designs and I appreciate your taking the time to explain the blocking. I had the basics from other things you'd written, but the detail you give here is very helpful. Thanks so much!
Nice info. Your results are terrific.
I went to look at some of the links to the baby booties patterns, and after the first one, the next (at least) half dozen are all bogus. I gave up.
Thanks so much for your tutorial on blocking!!!!!!!! I never blocked before and had no idea how to! My washclothes are going to look great!
Thanks for all your patterns, ebooks, everything! I wish you lived around me cause YOU are a WEALTH of KNOWLEDGE!!!!
Sue Morris
Thaks for the little garden Boy ja Girl patterns and thanks awfully a most exenllent tutorial. Greetings from Kemi. IT is the SnowCastle town in nothern Finland.
Marjo-Riitta
Thanks.
Thanks for the tutorial. It would be great to see a before and after picture next to each other at the end.
Thank you so much for the tutorial, I had never see this done before, so helpful. Thank you also for the patterns.
All that for one little wash cloth!
That's why I prefer to make those very pretty round cloths.
Thank you so much for the tutorial on blocking. I wanted to make the project special but didn't really understand how it would make the pattern pop.
Thank you so much for sharing your talent and expertise. I LOVE the way you block the dishcloths for gift giving, and your patterns are awesome.
I have never blocked but will try it now. Thanks.
Dolly hi hi . . . I've just become a fan of knitting "imaginary knitting" for dishcloth's and thxx to ur "blocking" technique wow !! I've become an even bigger fan :) that is what use to bug me how to get the imagine to "pop"
hugs Dolly . . . Kiwi (NZ) living in Thunder Bay, Ont CANADA 3 Nov 2019
I am at row 43. Is there a mistake as I have 1 stitch too many and have done it 6 times.
I ordered 4 of your hanger towel patterns last week and still have not received them. Not at all impressed as the money has been taken from my PayPal account for this purchase. Love your designs but extremely disappointed by your lack of action.
Post a Comment