
Thursday, June 24, 2010

Rachel's Knitting Room

June 2010 KAL

Thursday, June 24, 2010 ~ Day 4 ~ Rows 19 to 24

~ ~ ~ ~ ~

~ ~ ~ ~ ~

Our June KAL is compliments of our great Group Moderator, Marilyn Wallace!

~ ~ ~ ~ ~

Today's Instructions:
-------------------------------------------

Row 19 B5 p4 k2 p3 k2 p2 k2 p1 k2 p2 k2 p1 k2 p1 k3 p1 k2 p1 k2 p6 B5

Row 20 B5 k41 B5

Row 21 B5 p4 k2 p3 k2 p2 k2 p1 k2 p2 k2 p1 k2 p1 k3 p1 k2 p1 k2 p6 B5

Row 22 B5 k41 B5

Row 23 B5 p2 k6 p1 k2 p2 k2 p1 k2 p2 k2 p1 k4 p1 k4 p1 k6 p2 B5

Row 24 B5 k41 B5

Previous Instructions:
------------------------------------------

Materials:
4 mm short, circular needles (16 inches)(knit straight on them) or US#6
1 ball cotton yarn for a Dish Cloth or
1 ball CottonTots for a soft, Spa Cloth

Special Instructions:
B5 means to do border for 5 stitches (always keep the seed st. sequence)
How to do seed st. on odd number of stitches & even number of st.

Cast on 51 st.
Row 01 seed st. across row
Row 02 seed st. across row
Row 03 seed st. across row
Row 04 seed st. across row
Row 05 seed st. across row
Row 06 B5 k41 B5

Row 07 B5 p41 B5
Row 08 B5 k41 B5
Row 09 B5 p4 k2 p3 k2 p2 k2 p3 k2 p3 k2 p5 k2 p1 k6 p2 B5
Row 10 B5 k41 B5
Row 11 B5 p4 k2 p3 k2 p2 k2 p3 k2 p3 k2 p5 k2 p1 k6 p2 B5
Row 12 B5 k41 B5

Row 13 B5 p4 k2 p3 k2 p2 k2 p3 k2 p3 k2 p5 k2 p1 k2 p6 B5
Row 14 B5 k41 B5
Row 15 B5 p4 k2 p3 k6 p2 k4 p2 k2 p5 k2 p1 k6 p2 B5
Row 16 B5 k41 B5
Row 17 B5 p4 k2 p3 k6 p1 k6 p1 k2 p1 k3 p1 k2 p1 k6 p2 B5
Row 18 B5 k41 B5

~ ~ ~ ~ ~

Wednesday, June 23, 2010

June 2010 KAL

Wednesday, June 23, 2010 ~ Day 3 ~ Rows 13 to 18

~ ~ ~ ~ ~

Link to this pattern in Ravelry:

~ ~ ~ ~ ~

Our June KAL is compliments of our great Group Moderator, Marilyn Wallace!

~ ~ ~ ~ ~

Today's Instructions:
-------------------------------------------

Row 13 B5 p4 k2 p3 k2 p2 k2 p3 k2 p3 k2 p5 k2 p1 k2 p6 B5

Row 14 B5 k41 B5

Row 15 B5 p4 k2 p3 k6 p2 k4 p2 k2 p5 k2 p1 k6 p2 B5

Row 16 B5 k41 B5

Row 17 B5 p4 k2 p3 k6 p1 k6 p1 k2 p1 k3 p1 k2 p1 k6 p2 B5

Row 18 B5 k41 B5

Progress Pics:

Previous Instructions:
------------------------------------------

Materials:
4 mm short, circular needles (16 inches)(knit straight on them) or US#6
1 ball cotton yarn for a Dish Cloth or
1 ball CottonTots for a soft, Spa Cloth

Special Instructions:
B5 means to do border for 5 stitches (always keep the seed st. sequence)
How to do seed st. on odd number of stitches & even number of st.

Cast on 51 st.
Row 01 seed st. across row
Row 02 seed st. across row
Row 03 seed st. across row
Row 04 seed st. across row
Row 05 seed st. across row
Row 06 B5 k41 B5

Row 07 B5 p41 B5
Row 08 B5 k41 B5
Row 09 B5 p4 k2 p3 k2 p2 k2 p3 k2 p3 k2 p5 k2 p1 k6 p2 B5
Row 10 B5 k41 B5
Row 11 B5 p4 k2 p3 k2 p2 k2 p3 k2 p3 k2 p5 k2 p1 k6 p2 B5
Row 12 B5 k41 B5

~ ~ ~ ~ ~

Tuesday, June 22, 2010

Rachel's Knitting Room

June 2010 KAL

Tuesday, June 22, 2010 ~ Day 2 ~ Rows 7 to 12

~ ~ ~ ~ ~

Link to this pattern in Ravelry:

~ ~ ~ ~ ~

Our June KAL is compliments of our great Group Moderator, Marilyn Wallace!

~ ~ ~ ~ ~

Today's Instructions:
-------------------------------------------

Row 07 B5 p41 B5

Row 08 B5 k41 B5

Row 09 B5 p4 k2 p3 k2 p2 k2 p3 k2 p3 k2 p5 k2 p1 k6 p2 B5

Row 10 B5 k41 B5

Row 11 B5 p4 k2 p3 k2 p2 k2 p3 k2 p3 k2 p5 k2 p1 k6 p2 B5

Row 12 B5 k41 B5
~ ~ ~ ~ ~
~ ~ ~ ~ ~

Previous Instructions:
------------------------------------------

Materials:
4 mm short, circular needles (16 inches)(knit straight on them) or US#6
1 ball cotton yarn for a Dish Cloth or
1 ball CottonTots for a soft, Spa Cloth

Special Instructions:
B5 means to do border for 5 stitches (always keep the seed st. sequence)
How to do seed st. on odd number of stitches & even number of st.http://knitting.about.com/od/stitchglossary/g/seedstitch.htm

Cast on 51 st.
Row 01 seed st. across row
Row 02 seed st. across row
Row 03 seed st. across row
Row 04 seed st. across row
Row 05 seed st. across row
Row 06 B5 k41 B5

~ ~ ~ ~ ~

Monday, June 21, 2010

Rachel's Knitting Room

June 2010 KAL

Monday, June 21, 2010 ~ Day 1 ~ Rows 1 to 6

~ ~ ~ ~ ~

~ ~ ~ ~ ~

Our June KAL is compliments of our great Group Moderator, Marilyn Wallace!

~ ~ ~ ~ ~

Today's Instructions:
-------------------------------------------

Materials:
4 mm short, circular needles (16 inches)(knit straight on them) or US#6
1 ball cotton yarn for a Dish Cloth or
1 ball CottonTots for a soft, Spa Cloth

Special Instructions:
B5 means to do border for 5 stitches (always keep the seed st. sequence)
How to do seed st. on odd number of stitches & even number of st.

Cast on 51 st.

Row 01 seed st. across row

Row 02 seed st. across row

Row 03 seed st. across row

Row 04 seed st. across row

Row 05 seed st. across row

Row 06 B5 k41 B5

~ ~ ~ ~ ~

Progress Pics to follow later :o)

Saturday, June 19, 2010

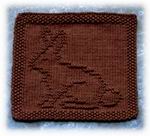
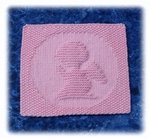
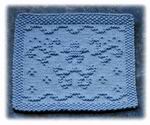
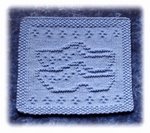
Our June 2010 Mystery Dishcloth Knit Along!
.
Get your needles and cotton ready! Our next mystery dishcloth kal is coming up!
.
~ ~ ~ ~ ~
.
Link to this pattern in Ravelry:
.
~ ~ ~ ~ ~
.
When Will it Start:
.
Monday, June 21, 2010
.
~ ~ ~ ~ ~
.
What Will You Need:
.
4 mm short, circular needles (16 inches)(knit straight on them) or US#6
1 ball cotton yarn for a Dish Cloth or
1 ball CottonTots for a soft, Spa Cloth
.
~ ~ ~ ~ ~
.
Suggested Colours For You:
.
Any SOLID colour will do for this pattern.
.
~ ~ ~ ~ ~
.
Stitches That Will Be Used:
.
Knits and Purls.
.
~ ~ ~ ~ ~
.
Any questions or concerns feel free to email me at ramavasc@yahoo.com
.
Hugs,
Rachel

Where you can find me:

Follow Me On Twitter:

Knits by Rachel:

Rachel's Knitting Corner:

Wednesday, June 09, 2010

I apologize to everyone for being missing in action lately. It's been an extremely difficult week for us after losing a very special little girl unexpectedly that was really close to our hearts. My kids have especially taken the sad news hard so it's been a lot to deal with but we're slowly getting through it.
.
On top of all that the kids' school year will be coming to an end real quick and it seems that the teachers have decided to pile as much stuff on the kids as they possibly can in the short time they have left so it's been a little crazy around here to say the least! My house is completely upsidedown and there's nothing I can do about it at the moment. I am just counting down the days till the end of school. I am looking forward to not having to get the kids up and ready for school and having to help them with all their bazillion projects and whatnot!
.
When I stop and think of all the stuff I still have to take care of I find myself starting to panic so I just need to take one thing and one day at a time or I fear I will completely lose it...lol! Wish I had the power to freeze time...it would surely come in handy!
.
Anyway, I'm sure everyone else has a lot on their plate as well lately but I just wanted to check in and let you know I'm still here. There will be another KAL coming up real soon too...3rd Monday of June! I will post more details for you a little later on.
.
Take care and I wish you all a great day!
.
Hugs,
Rachel

Our May 2010 Mystery Dishcloth Knit Along
.
Designed by Eva Skulbru Eriksen
.
Thank you to Eva for allowing Rachel's Knitting Room to use her beautiful pattern for our Mystery Dishcloth Knit Along!

Friday, May 14, 2010

Our May 2010 Mystery Dishcloth Knit Along!


Get your needles and cotton ready! Our next mystery dishcloth kal is coming up! I will reveal the name of the designer when our kal is complete.

You can link to this pattern in Ravelry:
~ ~ ~ ~ ~

When Will it Start:

Monday, May 17, 2010

~ ~ ~ ~ ~

What Will You Need:

Worsted weight cotton yarn
Size US 6 (4mm) knitting needles
2 Stitch Markers

~ ~ ~ ~ ~

Suggested Colours For You:

I would suggest a solid colour but I do think that a self-striping yarn, twisted or variegated would also look quite nice. It's all up to you. I have a feeling that after you finish this pattern you'll want to make more in all sorts of colours!

~ ~ ~ ~ ~

Stitches That Will Be Used:

K = Knit
P = Purl
Yo = Yarn over
Ssk = Slip, slip, knit
K2tog = Knit two together
M1 = make one using strand between two stitches

~ ~ ~ ~ ~

Any questions or concerns feel free to email me at ramavasc@yahoo.com

Hugs,
Rachel
Where you can find me:
Follow Me On Twitter:

Knits by Rachel:

Rachel's Knitting Corner:

Tuesday, April 27, 2010

How Do You Block Your Patterns?
.
This is the number one question I get asked all the time!
.
So I thought I'd put together a little slide show tutorial which actually turned out to be not so little when it was all said and done...lol!
.
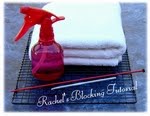
Before starting here's the things you will need:

1. bath towel
2. cooling rack
3. crochet hook
4. knitting needle
5. water spray bottle
.
The crochet hook isn't an essential but I find it works real good to get in the little places that need to be flattened.
.
You will notice throughout the tutorial that I refer to the dishcloth pattern as the cotton piece. I say cotton piece because these blocking instructions will work well for any cotton dishcloth, placemat or towel with a picture on it.
.
1) Fold the bath towel in half and then in half again so you have a nice cushy bottom. The reason for the folded bath towel is so that you have a thick base so that when you push the background stitches of your Dishcloth down, it kind of makes the picture or letter stitches of your piece embossed or puffed up.
.
2) Lay your cotton piece down on top of the folded bath towel.

3) Now flip the piece over and give the back a good spray.


4) Turn it over and do the same to the front of your piece.


5) Now give a little tug all around to try and get your piece all nice and straight around the edges. Sometimes I find a ruler works as a good straight edge when doing this.

6) Okay, now I usually work from the inside of my piece, out. It's not crucial but that's just how I do it.

7) What you want to do is push down in a stamping motion on all your flat (stockinette) stitches with the back of your knitting needle. I start along one edge and work my way around, moving to the center as I go along, in this case we're working on the top of Little Garden Boy's hat.


8) Now move on down to the rest of the hat and do the same thing, getting those stockinette stitches nice and flat. You will start to notice because of the cushy bottom from your bath towel, the bumpy (garter) stitches standing out more.

9) If you get a stubborn stitch that just doesn't want to be pushed down like this one, just push it down with the pointy part of your needle and tell it to stay!


10) Now, doing the same thing with the pointy part of your needle, move on down the backside of Little Garden Boy.


11) Okay, see those itty bitty stubborn stitches along both sides of his arm? Get your needle and start poking! You can pretend he's your little voodoo doll!


12) Now you're going to want to flatten his tummy with the back of your knitting needle. Don't you wish getting a flat tummy was just that easy?


13) Move around flattening his backside with your needle.

14) Now you'll see his body taking shape. I find it's kind of like when you did colouring pages as a kid and you outlined everything in marker before filling it in with crayon...well, that's how I used to colour anyway.


15) Okay, now make your way around the outside of him with the point of your needle.


16) All the way around...


17) If you've got a line of stitches like this one down his back, you can just press down with the side of your needle on both sides of that line...


18) ...as well as the bottom stitches of his boot.


19) After you've made it all the way around him you can flip your needle around and start flattening the rest of the stockinette stitches with the back of your knitting needle.


20) Now everything is done except for his little watering can and the flowers along the side borders.

21) So let's start with the watering can.

22) This is where the end of the crochet hook works well. Push down those stockinette stitches inside the watering can's handle.


23) Now we'll work on the little flowers.

24) See those single stitches that make up the flower? Get your knitting needle and stick the pointy end right inside one of those stitches.

25) Now lift up on it while holding your piece down with the other hand...don't worry about how hard you pull up on that stitch, it goes back down. We just want to make it pop up a bit more than it is.


26) Okay, now all the loops of the flower have been pulled up with the point of my needle so now get your crochet hook and push the end of it right in the middle of those loops.

27) You can use the crochet hook for the middle of the stem of the flower as well.

28) Now get your knitting needle and make a nice little "X" with it in between those loops of the flower.


29) Press the side of your needle alongside the diagonal stitches of the flower's stem.


30) Flatten any surrounding background stitches and voila!

31) Looking at both flowers (bottom flower is done but the top one hasn't been blocked yet) doesn't seem like it makes much of a difference but believe me it does! The difference is all in the drying of your piece. That's when you'll notice all your hard work!

32) Now you're going to want to very gently pick up your blocked piece and lay it on your cooling rack. I choose to use a cooling rack so everything dries evenly. If you're in a real hurry for it to dry, you can also stick a fan in front of it... the moving air will dry it in no time at all!

Here is Little Garden Boy all finished, blocked and dried!
.
Now I couldn't imagine having to block a dishcloth after every use of it but when giving as a gift I always like my cloths to look as pretty as they can be for their recipient...it makes a big difference :o)
.
Enjoy and I hope you find this info helpful with your next project!
.
Hugs,
Rachel
.
Follow me on TWITTER:

Knits by Rachel:

Rachel's Knitting Corner: